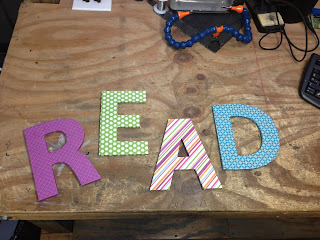
In the efforts to continue all of my back to school projects, I have disciplined myself into accomplishing 1-2 crafts a day. Hopefully if I keep myself on track, I will have a wonderful new classroom full of DIYs!
Today's project is my READ sign that I plan on hanging above my classroom library.
Materials you will need:
- Mod podge ( I prefer the matte version)
- Cardboard/wood letters (the cardboard letters that I found were much cheaper than the wood. I believe I went to Hobby Lobby for them.)
- Scrap paper.
The Process:
Really this project is SUPER EASY! All you need to do is pick out your paper that you want to use. You can do the same pattern for all four letters, or you can pick different patterns. I preferred the different patterned paper.
Once you have decided what paper to use, take your mod podge and cover the entire front of the letter. Flip the letter upside down and stick it to the backside of your patterned paper. Let it sit for a few minutes will doing the same process to all four letters.
After the letters have dried, take an exacto knife and cut the sides of your letter. I would cut about a 1/4 of an inch out from the letter. This will allow enough paper to cover the sides.
Again take your mod podge and cover the sides of your letters with the extra paper. With round shapes, I have found it to be easier to cut the paper into sections so that you don't wrinkle the paper on the sides.
Once you have completed the steps, allow the letters to dry!


No comments:
Post a Comment