
I'm BACK!! I always knew the beginning of the year was stressful, but I feel that this year my stress level has hit a new point! Co -teaching, ipads, new ELA curriclum, Common Core and Math, and a new bunch of kiddos has rendered me insane!! No not really, lets just say, there are millions of reasons I have been a way for a few weeks but I am glad to be back.
I am happy to report that although I am very stressed out with school, I am very excited for this new year. The ipad activities are going great and my kids are getting into the swing of third grade. I can't wait to continue through the school year and watch these kiddos grow into amazing learners!
Ok, now that I have explained why I have been away for so long, I am excited to post on a new project.
In my 8 years of teaching, I typically have the moment where I am calling, calling, calling for a student, only to find out that the students is... in the bathroom, at the nurse... etc. Having 25,26, or now 27 third graders, it is hard to keep track of all of those bodies. This board below allows you to quickly assess who is in the room and if students are gone, and where they are.

My inspiration came from pinterest and another great teacher blogger: Second Grade Style.

HOW TO:
The Materials:
1. Grab a cookie sheet, something cheap... I would suggest a large size. Be sure it is magnetic.
2. You will also need heavy duty magnets. Something similar to below:
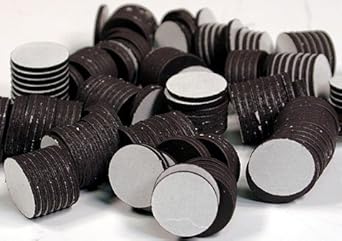
You will need enough for the number of students in your class.
3. Modgepodge
4. Ribbon
5. Scrapbooking paper, your choice!
The Steps:
Once you get all your materials, modge podge a piece of scrapbooking paper to your board. You will notice my board is not a cookie sheet, I was fortunate that my boyfriend is a welder and was able to cut out a 12 x 12 sheet of metal for me... but like I said this will also work with cookie sheets. You just may need to use more than one sheet of scrapbooking paper to cover the entire cookie sheet.
If preferred, you can also spray paint your board if you choose, however I troubleshot this and the paint quickly peeled off as the students used it.
You will want to drill two small holes at the top of your board to string your ribbon through to hang.
After the paper has been stuck on, take your ribbon and section out your board. Use modgepodge or hot clue to adhere the ribbon. Stick on your signs in the appropriate spots.
Next, take your magnets and place numbers on each magnet. Place the magnets on your board. I would suggest using hot glue on your magnets.
The board will need a few minutes to dry and then it should be ready to go for your classroom!
I would be happy to share my file with the pieces ready to print as needed. Just comment below.


- Happy Crafting!

No comments:
Post a Comment